|
by JAMIE NOGUCHI |
Hurray cell shading! I had this whole intro planned, but who cares. Let's just get on with the tutorial.
|
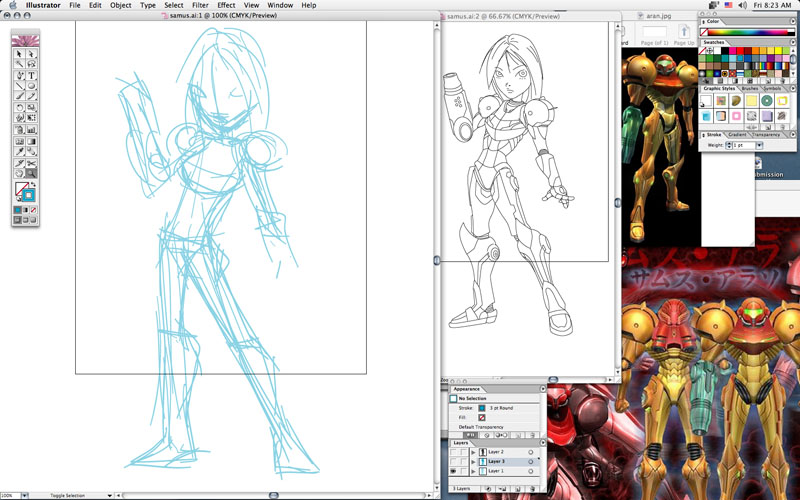
STEP 1 - Gesture Gesture drawings are fun and exciting and a great way to warm up those wrists. The idea is to get throw down some quick lines to loosely define what you're drawing. This shouldn't take much more than ten seconds. I rocked out with Illustrator and the brush tool. Make sure to turn off "Keep Selected" in the brush options or it'll get really annoying. You can see my fun references on the right side. |
|
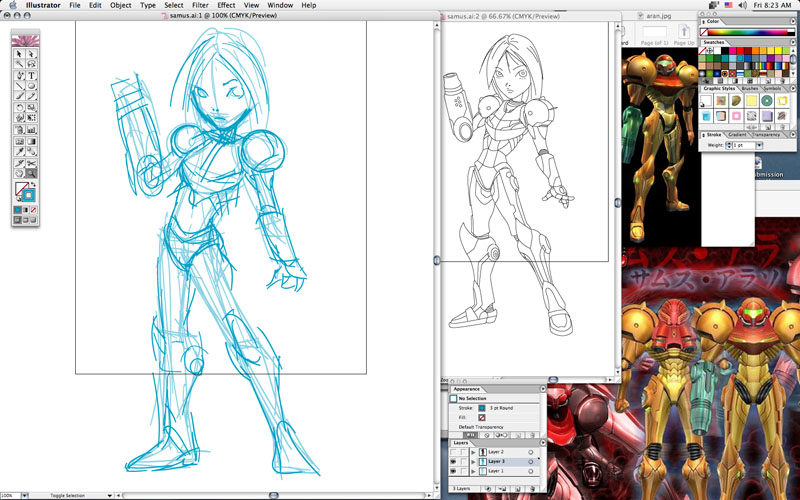
STEP 2 - Tighten up Gesture My gesture was a little sloppy for my tastes so I grabbed a darker blue to tighten up some features like the face and some of the joint armors. |
|
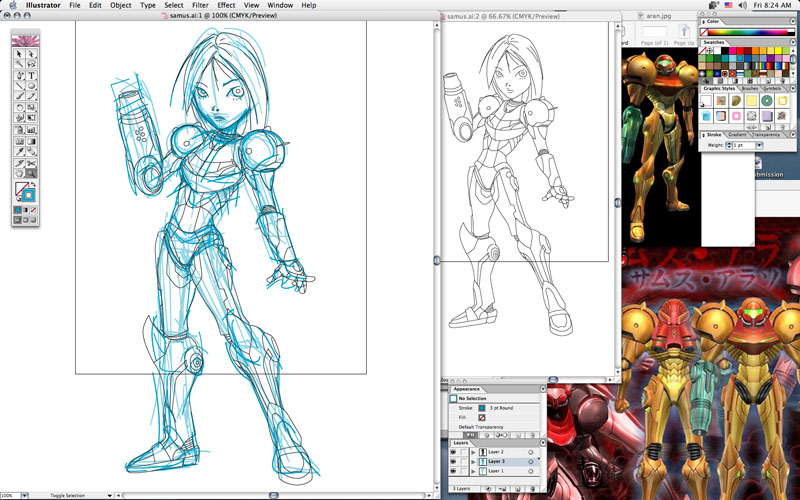
STEP 3 - Line Art Now it's time to clean that mess up. I used the pencil tool on a layer above the gestures. You'll notice the second window to the right at a lower magnification. If you're working at a high magnification (I tend to ink at 200% to 300%) it's a good idea to zoom out every once in a while to see how things are going. |
|
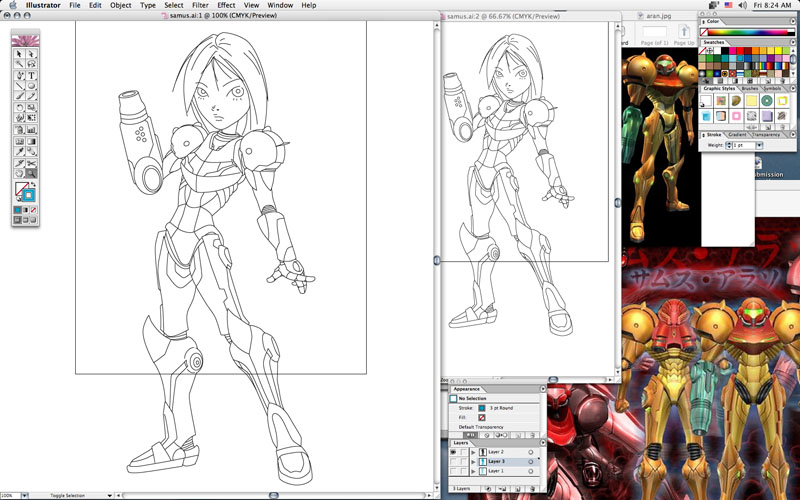
STEP 4 - Clean Line Art So fresh and so clean! Done with the lines. Now copy them joints into Photoshop and start with the flatting. In Photoshop, I create a new file 11x17 inches and at 400 dpi. I usually work big so that I can print out high res versions for my portfolio. |
|
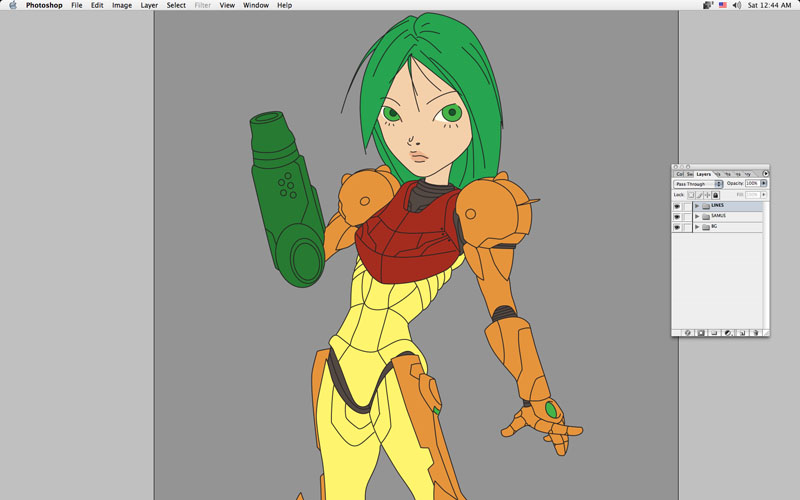
STEP 5 - Flats Improper flatting will lead to horrible diseases that have yet to be cured but that will be the subject of another tutorial. I like to throw in a gray background when I flat just for contrast sake. |
|
STEP 6 - Shadows Fun time! Create a new layer and set it to multiply. Take it down to about 70% or so. I use a 50% gray color to start with. It looks a little flat, but the point is to get it done. I used to color each and every individual color but that takes a long time. Using a layer for all the shadows makes corrections easier. |

|
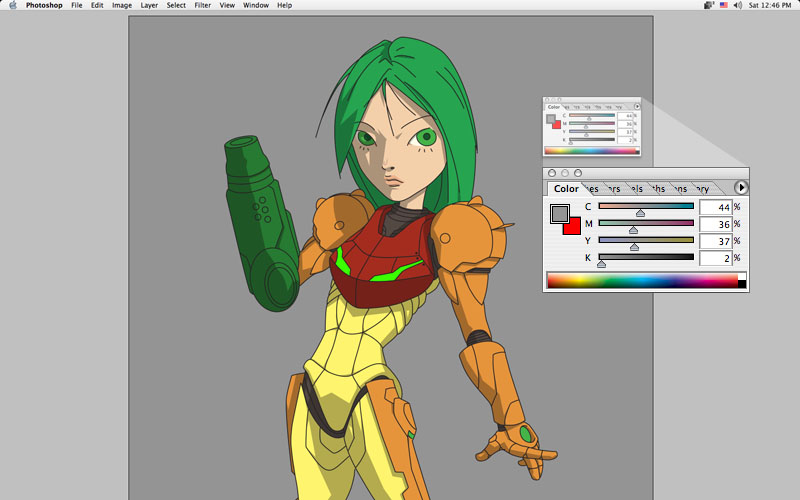
STEP 7 - Refined Shadows The gray multiplied layer turns out to look kinda flat so turn on Lock Transparent Pixels and start filling with colors that you like. I like a light purple for the shadow color. It sets a nice little mood. Blues are nice, too. Play around with different shadow colors to establish the right mood for your piece. |
|
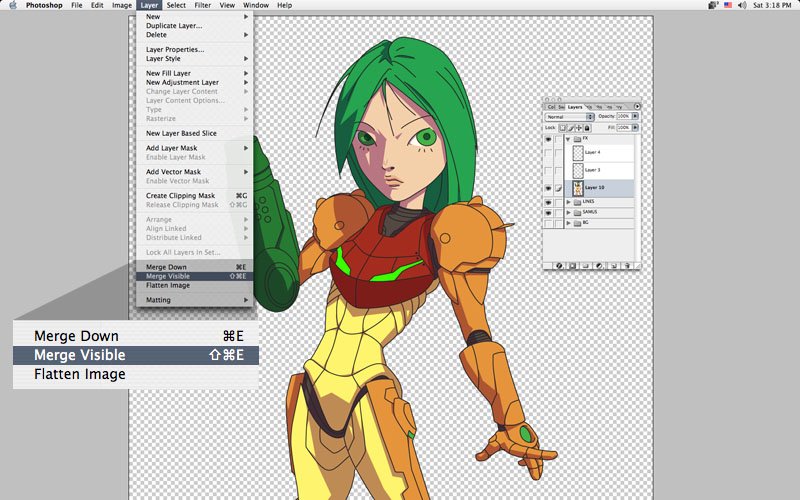
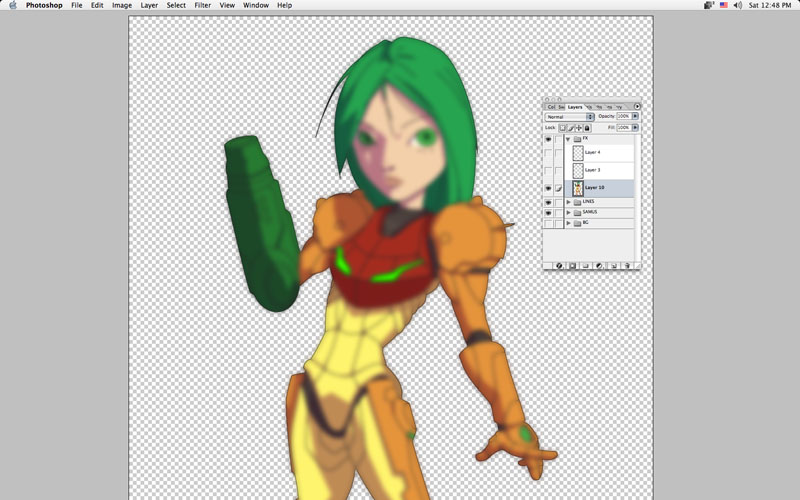
STEP 8 - Merge Visible You could just stop with the basic shadows. But I like to add a little something something. Turn off your background layer and create a new empty layer on top of your line art layer. Make sure your new layer is selected and Merge Visible. |
|
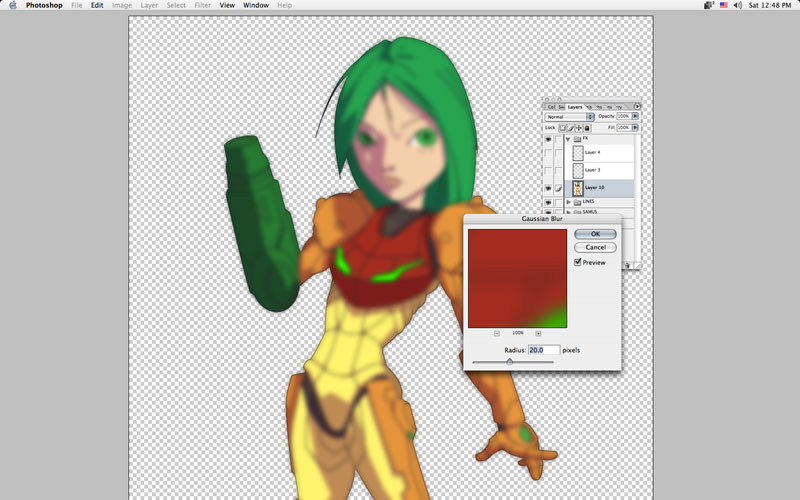
STEP 9 - Gassian Blur The new layer will have the lines, the shadows, and the flats all in one. WHEE! Now Gassian Blur that jammy jam so that you can barely make out the lines. I like a value of about 20. You can do more. Less than 20 makes the next step ungood. |
|
STEP 10 - Blurred This is what your blurred layer should look like. |
|
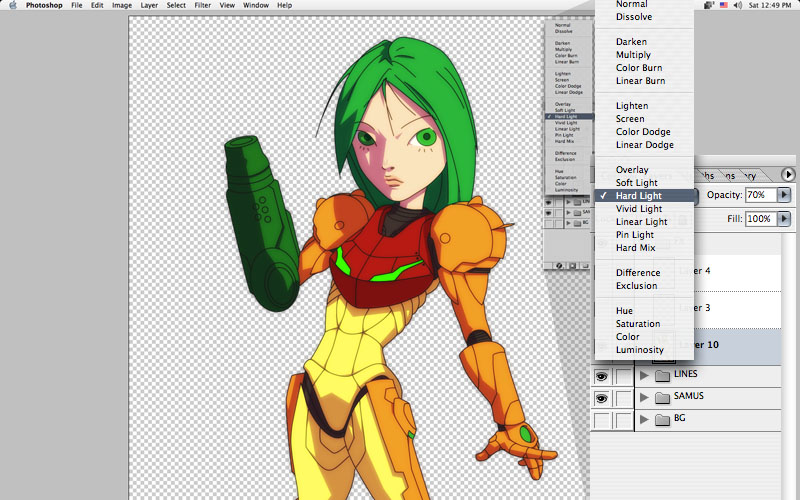
STEP 11 - Hard Light Set your blurred layer to Hard Light at about 70%. This should brighten up your colors a bit. Your lines will also take on the some of the color tone of the surrounding regions. |
|
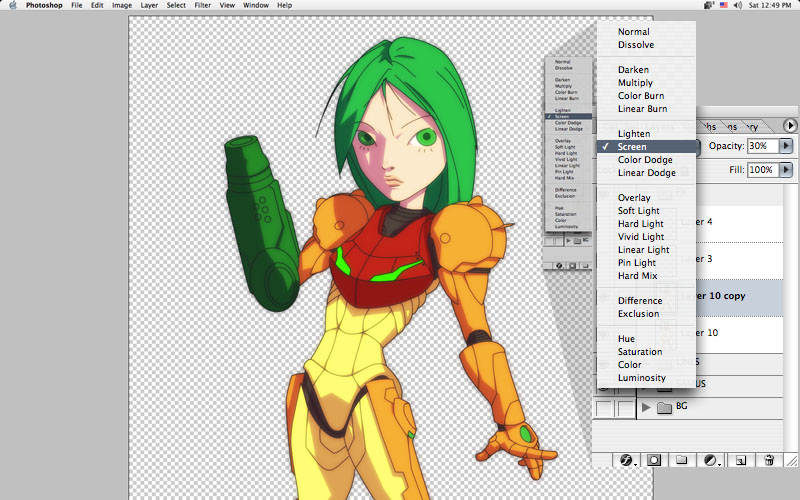
STEP 12 - Screen Duplicate that blurred layer and the duplicated layer to Screen at 30%. This will give your character a neat little halo against a darker background. |
|
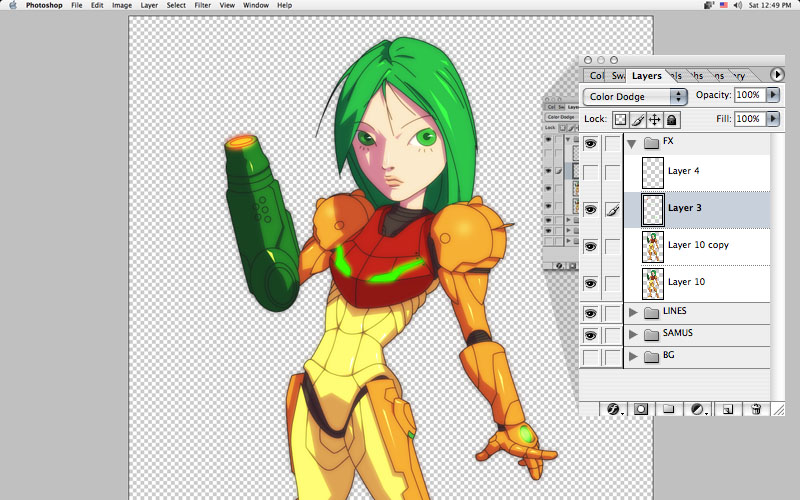
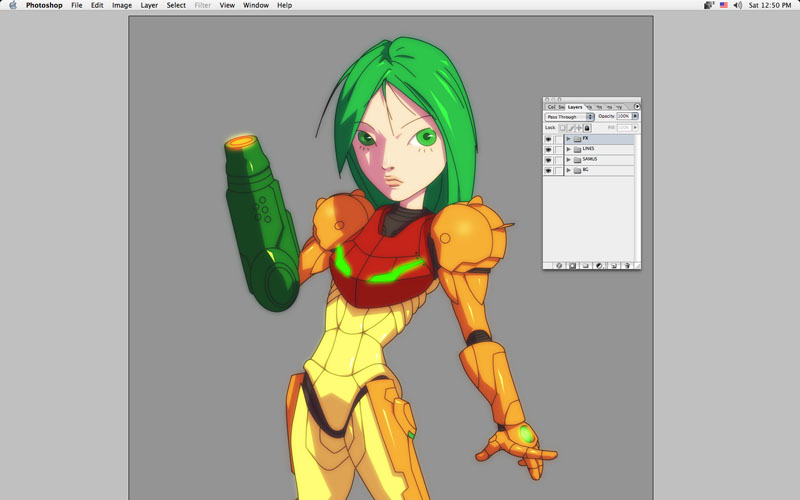
STEP 13 - Highlights Since Samus is rocking some armor, it's time to add some highlights. Create a new layer, set it to Color Dodge or Screen and start shining up that metal. I Color Dodge because the highlights are a little hotter. Don't forget to give those eyes a little gleam. |
|
STEP 14 - Final Cell Shading And voila! Here she is all shaded up and ready to rock. |
|
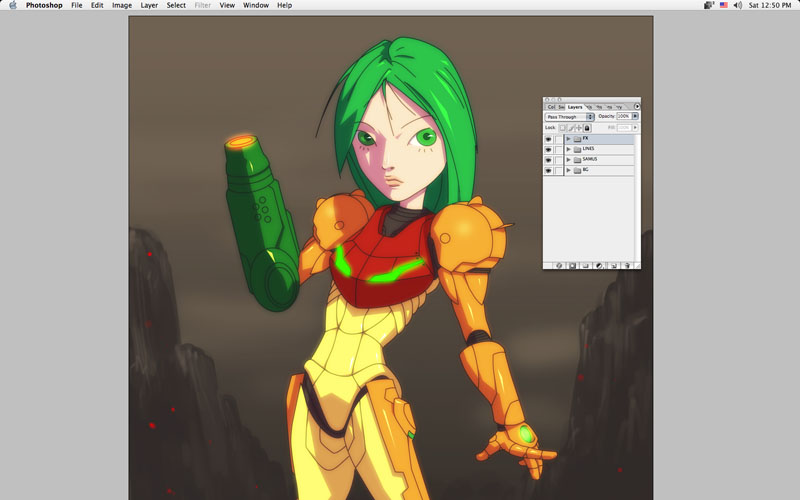
STEP 15 - Paint Background Paint in a nice background and you have a finished piece. You can head over to the Art Dump to see the final version of Samus. |
|
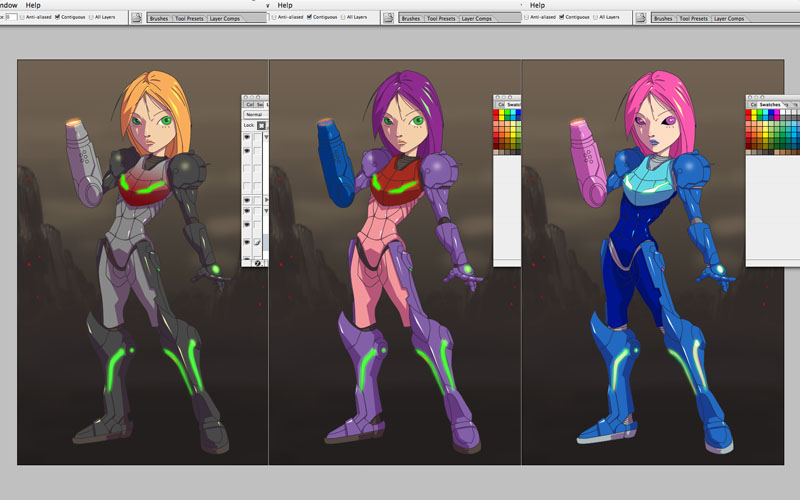
STEP 16 - Did You Flat Correctly, Right? The nice thing about this technique is that you can easily change colors without having to redo your shadows. If you flatted properly you can play around with different color schemes to your character. |
Well, that's all I got! Thanks for stopping by. Below are zip files of the Illustrator line art and a 72 dpi version the Photoshop colors. Feel free to download them and take a look. Oh, Samus Aran is copyright Nintendo so don't try selling anything. PC users, let me know if they don't work. I zipped them up on a Mac so who knows. Enjoy!