|
by JAMIE NOGUCHI |
This is just one of many digital painting techniques that you can use in your arsenal of Photoshop weapons! The basic idea is to render your subject in grey tones and then use layers to add color. You can achieve rather good results fairly quickly. The image for this tutorial only took three and a half hours or so. This technique is particularly good for creating textures for 3D models.
You can check out the final version of the image over at the Art Dump. Okay, enough with the blah blah, let's get painting!
|
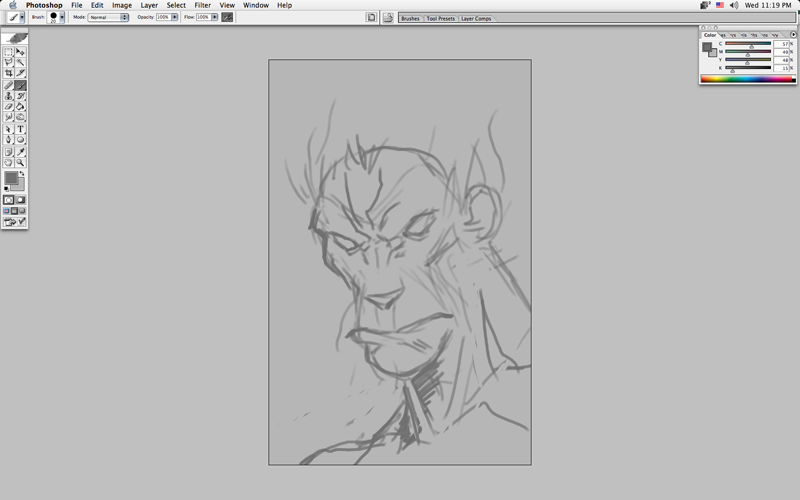
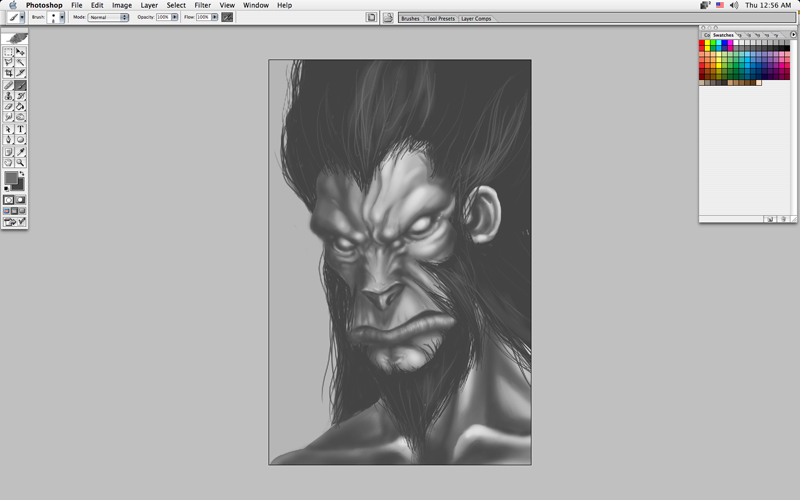
STEP 1 - Road Map We're going to be rendering in shades of grey. But first, we must lay out a road map to follow. I like to do things all digitally, but you can use penciled or inked lineart for this step. Create a new document and pick two shades of grey, a middle-light grey for the background and a middle-dark grey for you sketch. You're going to be using these two greys for most of the base rendering. Keep it nice and loose. |
|
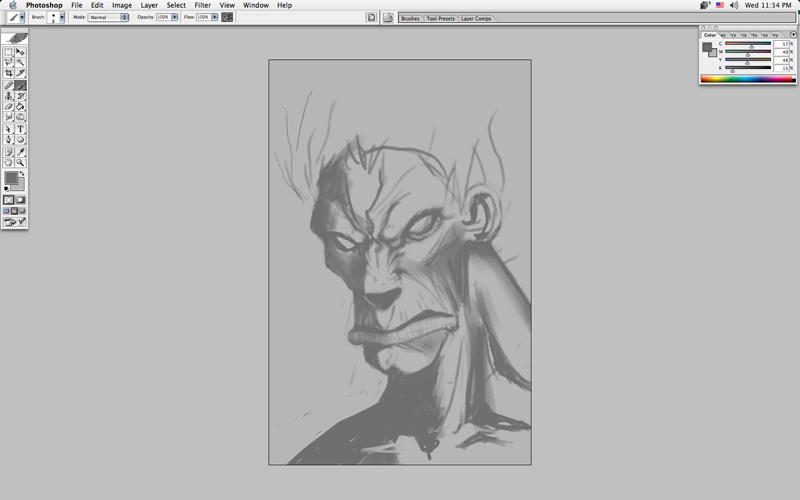
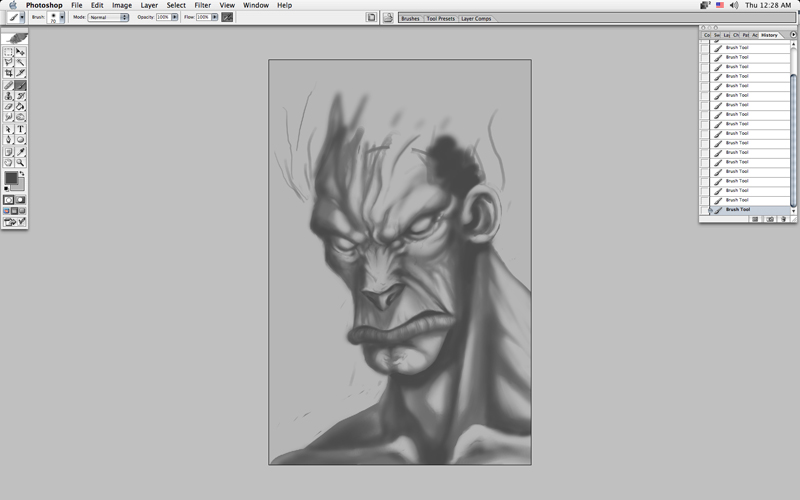
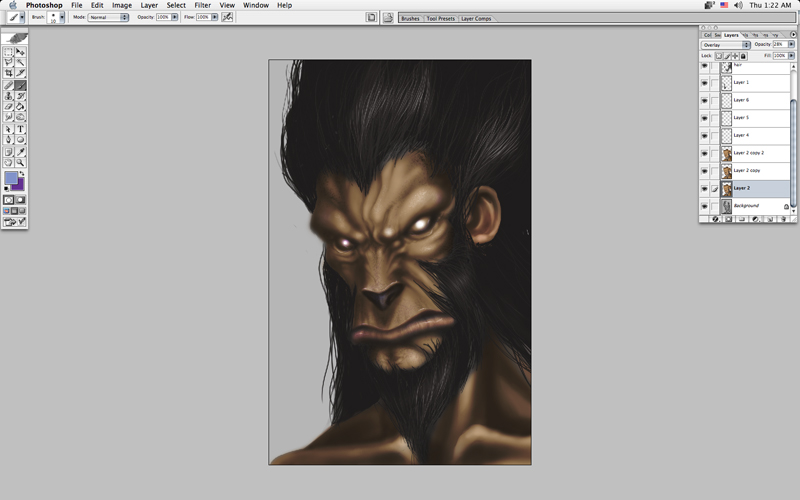
STEP 2 - Dark Shadows Now we begin the shading. I'm using Photoshop CS for this so the brush might be called something else in previous versions, but grab the Airbrush Pen Opacity Flow brush. This is my most favorite brush. You can use it to achieve some fairly convincing painter-like strokes. We're going to use it to start laying out our shadows. Start with the darkest areas of your subject. Begin with a fairly large size brush. If you need to change the diameter on the fly, use the [ and ] hot keys.
Establish a light source. You can see the light is on the upper left of Monkey right here. |

|
STEP 3 - Mid Shadows Same brush. Now with a lighter touch, start working in some mid-tone shadows. |
|
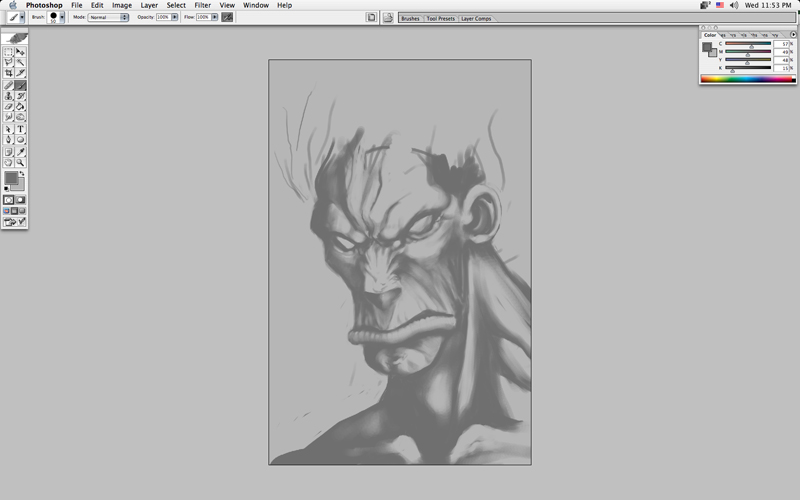
STEP 4 - Detail Shadows More with the shadows! At this point, you can also start cleaning up some of your sloppy lines and add some details like wrinkles and creases. By this point you should be using a smaller brush. As you get more detailed, the size of your brush should get smaller. |
|
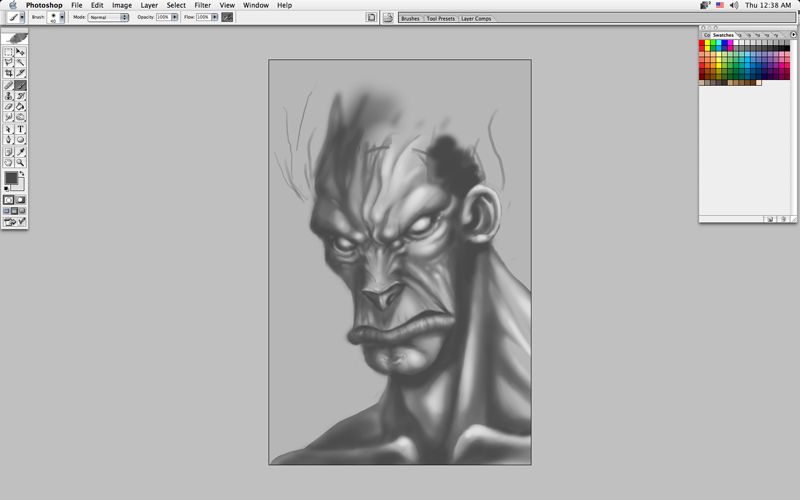
STEP 5 - Airbrushing Grab the Airbrush Soft Round brush and smooth it out now. You're looking to achieve smooth transitions between your shadows and your highlights.
By now you can also tell that I'm not putting too much detail in the neck area. I'm concentrating more on what I want your eye to focus on so most of my detail work is in the face. Ha! Really, I'm just being a smidge lazy. |
|
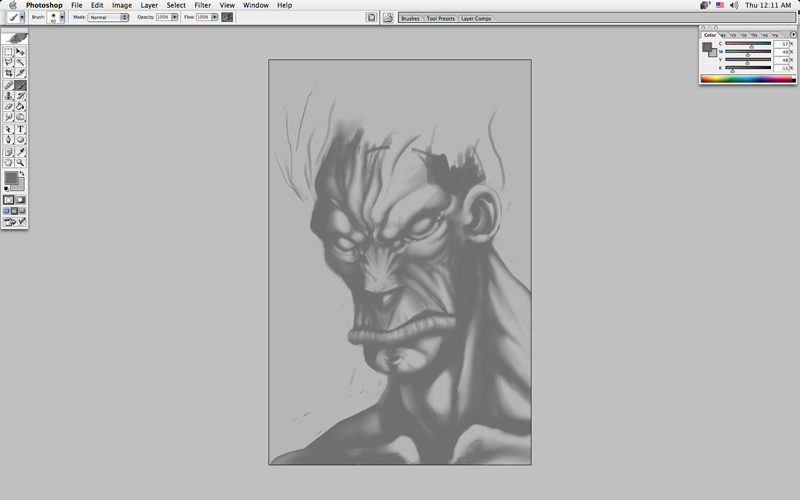
STEP 6 - Darker Shadows Looks pretty good, but a little on the flat side. Up until this point, we've only been using two colors. Now it's time to pop him out some. Grab a darker grey and work up some of the darker shadows. You can also add some more detail to your wrinkles. Avoid using a 100% black unless your piece calls for super harsh shadows. |
|
STEP 7 - Highlights Highlight time. Grab a light grey. Avoid 100% white. You rarely need to create such harsh highlights on skin. You may want to use 100% white if you're rendering metal or chrome, but most non-metallic surfaces don't have such hot highlights. |
|
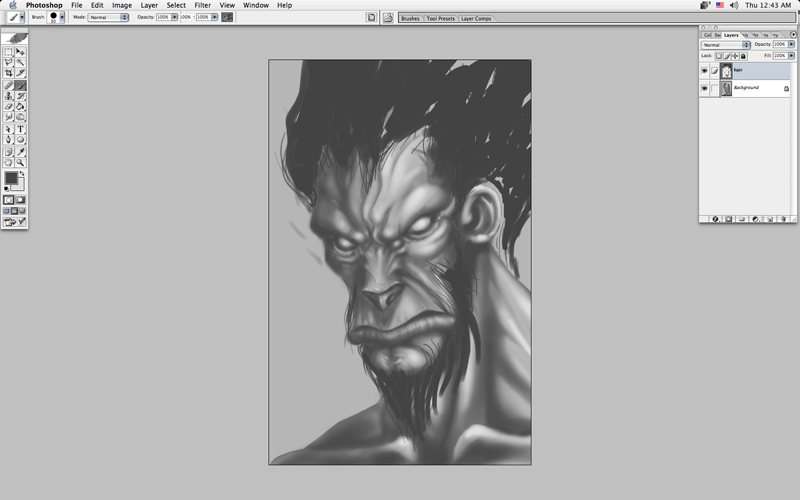
STEP 8 - Hair Create a new layer on top of your face layer. Go back and grab that Airbrush Pen Opacity Flow brush and swatch a dark grey and hair darker than your darkest shadow. Use this to loosely block in some hair. |
|
STEP 9 - More Hair More with the hair! |
|
STEP 10 - Mid-Tone Highlights Using mid to small sized brush strokes, fill in some mid tone hairs. |

|
STEP 11 - Bright Hilights With an even smaller brush and a brighter grey, fill in some brighter hairs and strands. |
|
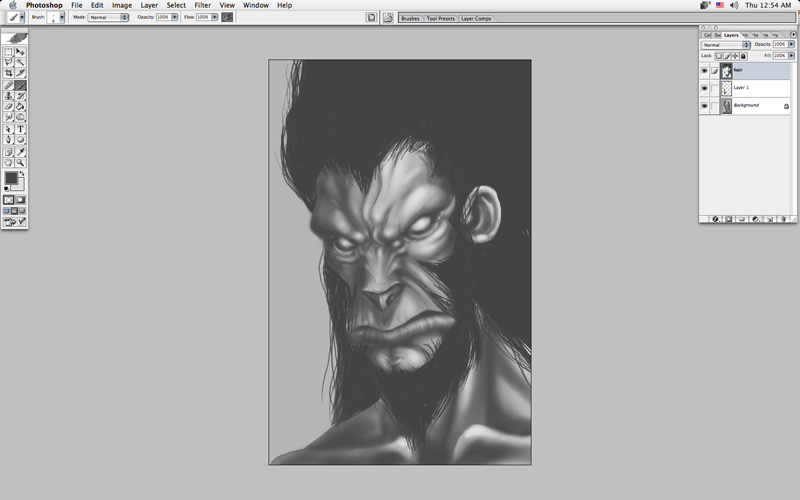
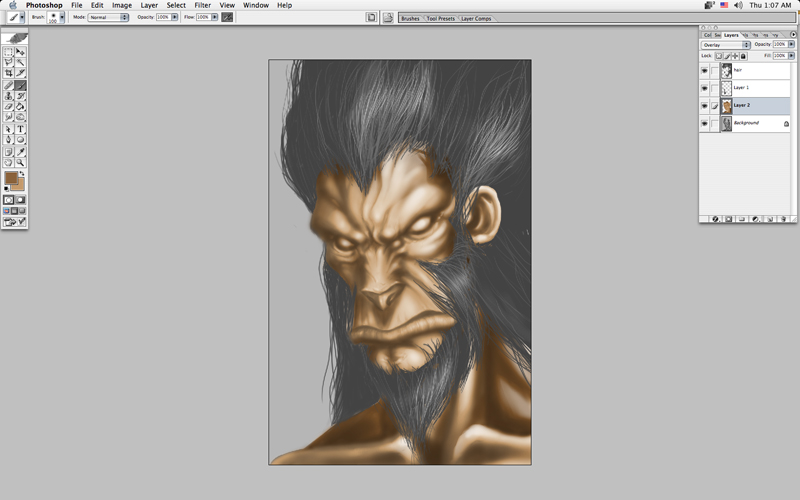
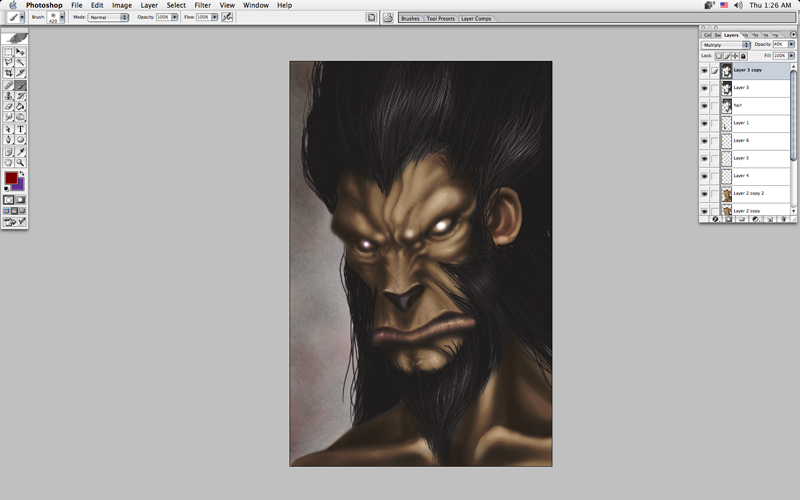
STEP 12 - Face-Color Overlay Color time! Create a new layer above your face layer and set its blending mode to Overlay. Grab some brown and color in the face. |
|
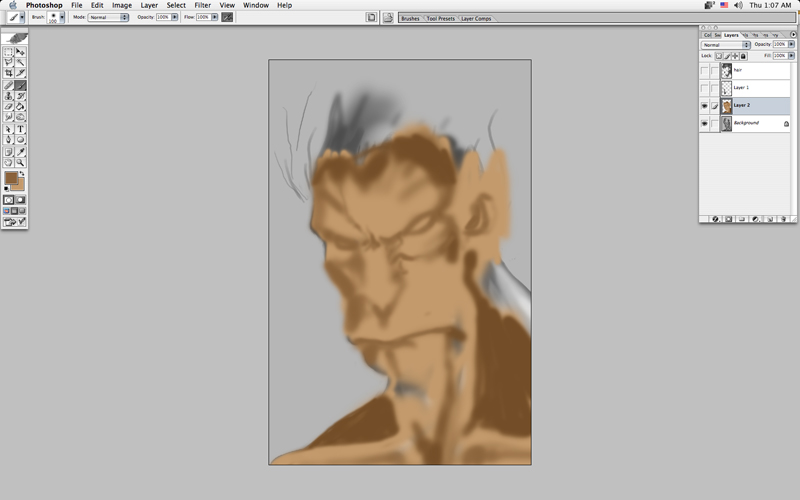
STEP 13 - Face-Color Sans Overlay This is what the color layer looks like on Normal. |
|
STEP 14 - Hair-Color Overlay Same deal with the hair. |
|
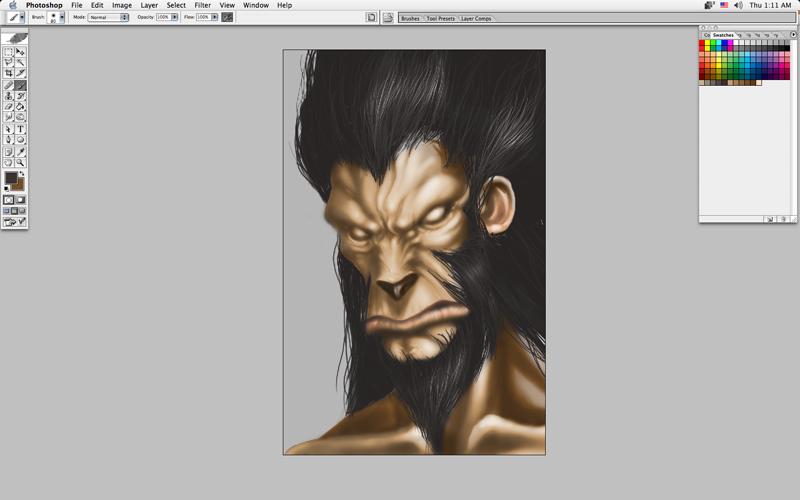
STEP 15 - Freckles and More Paint in some more details with different types of brushes. For this stage, I like to add new layers set to various blending modes. Color Dodge and Color Burn get a lot of use. For freckles, I usually use a blue or purple color set to Color Burn. The wet highlights on the eyes, nose, and lips are usually set to Color Dodge. Play around with layers and colors and see what you can come up with. |
|
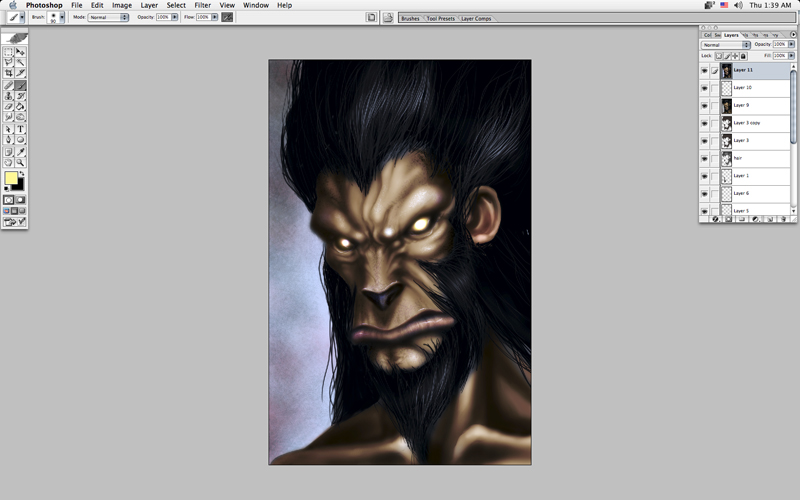
STEP 16 - Background Time Paint in some junk in the background. |
|
STEP 17 - Curves When you're finally done, create a new layer, Merge Visible from the Layer menu, and use Curves to pop it out. I found the background was too brownish which made the overall piece look fairly flat. With Curves, I was able to bring out more of the highlights in Monkey and put some blue tones in the background. Love them Curves! Just some bright yellow in the eyes and Monkey is done! |
Whoohoo! Done! I've uploaded a low-resolution version of the final Photoshop file so you can take a look at the various layers and what they do for the image. Have fun!